That loud snap you heard from your garage? If it was a cable breaking, you know exactly how bad it is. Your door won’t open, you can’t get your car out, and you’re looking at an emergency repair bill. Worse yet, a snapped cable under tension can cause serious injury if someone’s nearby when it happens.
After years of working on garage doors across NYC, I can tell you that cable failures almost never happen without warning. Cables give you signs they’re wearing out—fraying, rust, slack, unusual sounds. The problem is most people don’t inspect their cables until after they fail. By then it’s too late.
Learning how to prevent garage door cable snapping isn’t complicated, but it does require understanding what cables do, what causes them to fail, and maintaining them properly. Some of this maintenance you can do yourself. Other aspects—particularly anything involving spring tension or actual cable replacement—need professional hands. I’ll be clear about which is which.
This guide covers practical strategies to prevent garage door cable snapping based on real-world experience with NYC’s challenging environment. We’re dealing with temperature extremes, humidity, road salt exposure, and constant daily use that stresses cables. These conditions accelerate cable wear, making prevention even more critical here than in moderate climates.
What Garage Door Cables Actually Do (And Why They Fail)
Before getting into how to prevent garage door cable snapping, let’s understand what cables do and why they’re under so much stress.
The cable system explained:
Your garage door weighs 150-400 pounds depending on size and material. That’s heavy. The cables’ job is to support that weight and guide the door’s movement during opening and closing.
Torsion spring systems (most common in residential garages): Cables attach to the bottom corners of the door and run up through pulleys to drums mounted on the torsion spring bar. When springs unwind to lift the door, they rotate the drums, which wind up the cables, pulling the door up. When closing, springs wind back up as cables unwind from drums.
Extension spring systems (older or budget installations): Cables run from the bottom door corners through pulleys to extension springs mounted along the horizontal tracks. As door closes, springs stretch and cables bear the load. When opening, springs contract and pull cables.
In both systems, cables are under tremendous tension whenever the door moves. They also support door weight if springs fail, which is why garage doors have safety cables running through extension springs—if a spring breaks, the cable prevents the spring from flying loose.
What causes cables to fail:
Wear from cycles: Every time your door opens and closes, cables flex. The metal fibers rub against each other and against pulleys and drums. Over thousands of cycles, this friction wears the cable. Industry standards suggest cables last 10,000-15,000 cycles. If you use your door 4 times daily, that’s roughly 7-10 years. Heavy use shortens this dramatically.
Rust and corrosion: Cables are steel. Steel rusts in moisture. NYC’s humid summers, coastal salt air, and winter road salt create perfect conditions for corrosion. Rust weakens cable strands, making them brittle. Rusted cables can snap suddenly with little warning.
Incorrect installation: If cables aren’t properly seated in drums and pulleys, they experience uneven wear. Cables rubbing against edges rather than sitting in grooves get damaged quickly. Incorrect cable length creates improper tension—too tight and they’re overstressed, too loose and they fray from slack.
Spring tension issues: If springs lose tension (they weaken over time), cables bear more of the door’s weight. This overloads them and accelerates wear. Conversely, if springs are over-tensioned, cables experience excessive stress.
Environmental factors: Temperature extremes affect cable performance. Cold makes metal brittle. Heat causes expansion. The constant cycling between NYC’s winter and summer extremes fatigues metal faster than stable climates would.
Poor maintenance: Dry cables experience more friction. Dirty pulleys and drums create grinding that wears cables. Lack of inspection means small problems (slight fraying, beginning rust) progress to complete failure.
According to the International Door Association, cable failure is one of the top causes of garage door emergencies, and most failures could be prevented with proper maintenance and timely replacement.
Understanding these failure mechanisms is essential to knowing how to prevent garage door cable snapping effectively. Now let’s get into what you actually do about it.
Early Warning Signs: Catching Cable Problems Before They Snap
The key to preventing garage door cable snapping is catching deterioration early. Cables don’t usually fail without warning—they give you signs if you know what to look for.
Visual warning signs:
Fraying or broken strands. Cables are made of multiple steel strands twisted together. As cables wear, individual strands break. You’ll see small wire pieces sticking out from the main cable. This is the most obvious warning sign. Even a few broken strands mean the cable is compromised and could fail soon.
Rust and corrosion. Surface rust (orange discoloration) indicates moisture exposure. If you see rust flaking off or cables showing brown/orange coloring, they’re corroding. Heavy rust makes cables brittle. They can snap suddenly even without visible fraying.
Slack or unevenness. With door closed, cables should have some tension—not sagging loose. If one cable looks looser than the other, or if cables hang slack, tension is wrong. This could indicate spring problems, drum issues, or cable stretch.
Cable position on drum. Cables should sit in the grooves on cable drums, not bunched up or riding on drum edges. If cables aren’t tracking properly, they’re experiencing uneven wear and will fail prematurely.
Operational warning signs:
Door lifts unevenly. If one side rises faster than the other, cable tension is unequal. This puts extra stress on the tighter cable and will lead to failure.
Jerky movement. Smooth door operation means cables are working properly. If the door hesitates, jumps, or moves in stages, cables may be binding or experiencing uneven tension.
Grinding or squealing from pulleys. Cables run through pulleys at corners. If you hear grinding from pulleys during operation, cables may be frayed or pulleys may be worn. Either way, cable life is being shortened.
Door feels heavier than normal. If manual lifting (with opener disconnected) feels harder than usual, springs may be weakening. This puts extra load on cables.
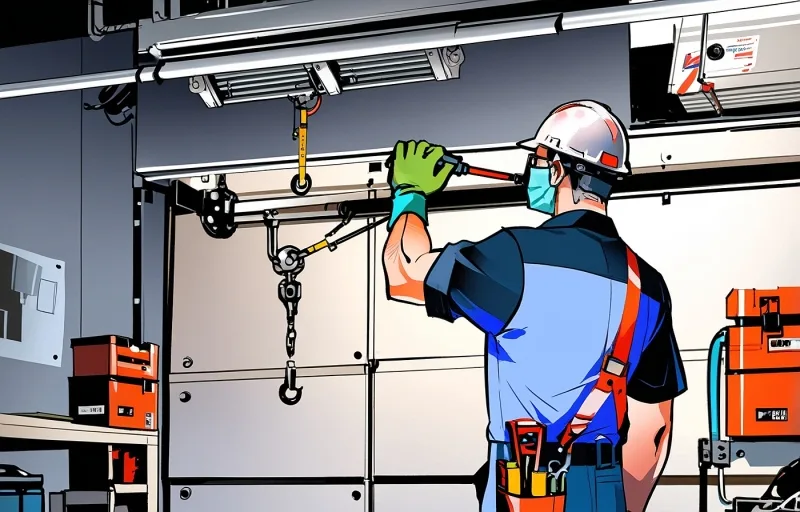
How to inspect cables safely:
Safety first: Never touch cables while door is connected to opener and springs are under tension. Disconnect the opener by pulling the emergency release cord. Ensure door is fully closed before inspection.
Visual check: Use a flashlight to examine the full length of each cable. Look for:
- Fraying or broken strands
- Rust or discoloration
- Kinks or damage
- Proper seating in drums and pulleys
Check cable drums. Look at how cables wind onto drums. Cables should sit in grooves, with wraps lying flat next to each other. If cables overlap, bunch up, or ride on drum edges, there’s a problem.
Inspect pulleys. Cable pulleys are at the top corners of the door. Check that:
- Pulleys spin freely
- Cables run through pulley grooves (not against edges)
- No visible pulley wear or damage
- Pulley mounting brackets are secure
Test door balance. With opener disconnected, manually lift door to chest height. A balanced door stays in place. If it drops or rises, spring tension is off. This affects cable loading.
When to call professionals immediately:
- Any fraying or broken strands visible
- Heavy rust or corrosion
- Slack cables or uneven cable tension
- Cable off drum or out of pulley groove
- Door extremely hard to lift manually (spring failure)
- Recent loud noise from garage (could be cable or spring snap)
Don’t attempt to operate the door if cables show significant wear. Call professionals for cable repair and assessment. For emergency cable issues, licensed technicians can respond quickly to prevent complete failure.
These inspections take 5-10 minutes monthly and can prevent catastrophic cable failure. Make it routine and you’ll catch problems when they’re still cheap and easy to fix.
Lubrication: Critical for Cable Longevity
Proper lubrication is one of the most effective ways to prevent garage door cable snapping. It reduces friction, prevents rust, and extends cable life significantly.
Why lubrication matters for cables:
Cables move constantly during door operation. They flex, rub against pulleys and drums, and experience internal friction as strands slide against each other. Without lubrication, this friction generates heat and accelerates wear. Lubrication also creates a moisture barrier that prevents rust formation.
What to use for cable lubrication:
DO use:
- Silicone-based spray lubricant
- Lithium grease spray
- Garage-door-specific lubricants
These products reduce friction without attracting dirt and debris.
DON’T use:
- WD-40 (it’s a solvent, not a lubricant)
- Motor oil (too thick, attracts dirt)
- Regular grease (gunks up, collects debris)
The wrong products actually accelerate cable wear by creating sticky surfaces that hold dirt against the cable.
How to lubricate cables properly:
Step 1: Clean first. Before applying new lubricant, wipe cables with a clean rag to remove dirt, old lubricant, and any rust dust. Clean cables allow better lubricant penetration.
Step 2: Apply lubricant to cables. Spray or apply lubricant along the full length of each cable. Focus on areas where cables contact pulleys and drums—these high-friction points wear fastest.
Step 3: Lubricate pulleys. Spray the axle where pulleys rotate. Ensure pulleys spin freely—seized pulleys create huge friction on cables.
Step 4: Lubricate drums. Apply lubricant to cable drum grooves where cables wind. This reduces friction as cables move on and off drums during operation.
Step 5: Work it in. Manually open and close the door a few times (with opener disconnected for safety). This distributes lubricant throughout the cable system.
Step 6: Wipe excess. Remove any dripping lubricant. You want a thin coating, not pools of liquid that will collect dirt.
Lubrication schedule:
Quarterly minimum for standard conditions. That’s every 3 months—mark it on your calendar.
Monthly in harsh conditions: If you’re in coastal areas with salt air, if your garage isn’t climate-controlled, or if you’re dealing with road salt exposure in winter, increase frequency to monthly.
After cable cleaning or rust removal: Anytime you clean cables or remove rust, reapply lubricant immediately.
What else to lubricate while you’re at it:
Since you’re already lubricating cables, hit these related components:
- Hinges (all pivot points)
- Rollers (bearings and stems)
- Springs (carefully—they’re under tension)
- Track surfaces (light coating only)
- Opener chain or screw drive
Comprehensive lubrication keeps the entire door system running smoothly, reducing stress on all components including cables. For complete garage door maintenance services, professionals can ensure every component receives proper care.
Signs your lubrication isn’t working:
- Cables look dry or have rust forming
- Squeaking or grinding during door operation
- Pulleys don’t spin freely
- Visible dirt or gunk buildup on cables
If lubrication doesn’t improve operation or if rust persists despite regular lubrication, cables may be too far gone for maintenance to help. Professional assessment determines whether cleaning and lubrication will suffice or if replacement is needed.
Proper lubrication is cheap insurance. A $10 can of lubricant and 15 minutes of time can add years to cable life. It’s one of the easiest and most effective things you can do to prevent garage door cable snapping.
Environmental Protection: Rust Prevention Strategies
In NYC’s challenging environment, rust is one of the top causes of cable failure. Effective strategies to prevent garage door cable snapping must address rust aggressively.
Why rust is so destructive to cables:
Rust doesn’t just discolor cables—it actively destroys them. When steel oxidizes, it becomes brittle. Rusted cable strands break more easily under stress. Rust also creates rough surfaces that increase friction and accelerate wear. A heavily rusted cable can snap suddenly with little warning.
NYC’s rust-promoting conditions:
Coastal humidity: Areas near water have constant moisture in the air. Cables in these environments rust much faster than inland locations.
Winter road salt: Salt is incredibly corrosive. It gets tracked into garages on vehicles, blown in by wind, or splashes up from streets. Even small amounts accelerate rust formation dramatically.
Temperature cycling: Condensation forms on metal surfaces when temperature swings occur. Morning condensation, afternoon drying—this cycle promotes rust.
Poor ventilation: Garages without good air circulation trap moisture, creating environments where rust thrives.
Rust prevention strategies:
Regular lubrication is your first defense. As discussed earlier, lubricant creates a moisture barrier. Keep cables consistently coated.
Rinse cables monthly in winter. Use a damp cloth to wipe down cables, removing road salt residue before it can cause corrosion. Dry thoroughly afterward, then reapply lubricant.
Improve garage ventilation. Install vents or leave garage door partially open periodically to reduce humidity buildup. Better air circulation means less condensation on cables.
Use rust inhibitor sprays. Products like Fluid Film or Boeshield T-9 create long-lasting corrosion barriers. Apply these in addition to regular lubricant, especially before winter.
Install dehumidifier. In consistently humid garages, a dehumidifier reduces moisture in air, dramatically slowing rust formation. This protects not just cables but all metal components.
Weatherstripping maintenance. Good seals keep moisture and salt spray from entering garage. Replace worn weatherstripping to reduce environmental exposure.
Garage door threshold seals. These prevent water, snow, and salt from coming under the door. Installing a quality threshold seal is one of the best investments for rust prevention.
Dealing with existing rust:
Light surface rust: Can often be addressed with rust removal and protection:
- Use fine steel wool or wire brush to remove rust
- Wipe clean with solvent to remove rust dust
- Immediately apply rust converter or inhibitor
- Coat with lubricant
Heavy rust or flaking: Usually indicates cables are compromised. Surface treatment won’t restore structural integrity. Replacement is needed.
Rust in cable strands: If individual strands show rust breaks, the cable is failing. Don’t try to treat it—replace it.
Material upgrades for harsh environments:
If you’re constantly battling rust despite good maintenance, consider upgrades when replacement time comes:
Galvanized cables have zinc coating that resists corrosion better than bare steel. They cost slightly more but last longer in humid or salty environments.
Stainless steel cables are the premium option. They won’t rust even in harsh coastal conditions. Significantly more expensive but can be worth it if you’ve replaced rusted cables multiple times.
For coastal Brooklyn, Rockaway, or other high-salt areas, investing in corrosion-resistant cables makes economic sense long-term.
Seasonal rust prevention routine:
Spring: Clean cables after winter, remove all salt residue, treat any rust spots, apply fresh lubricant and rust inhibitor.
Summer: Monitor for condensation-related rust, maintain ventilation, keep up quarterly lubrication schedule.
Fall: Pre-winter inspection, address any rust before salt season, apply extra rust protection, verify weatherstripping is intact.
Winter: Monthly salt removal, extra lubrication if needed, monitor for accelerated rust formation.
Rust prevention is crucial to preventing garage door cable snapping in NYC. The environmental challenges here mean you can’t just do basic maintenance—you need aggressive rust protection to keep cables functional long-term.
The Garage Door Balance Connection
Door balance directly affects cable longevity. Improperly balanced doors put excessive stress on cables and are a major factor in learning how to prevent garage door cable snapping.
What door balance means:
A balanced garage door has spring tension properly matched to door weight. When balanced, springs do most of the lifting work. The opener and cables just guide the movement. When unbalanced, cables bear more load than they’re designed for.
How to test door balance:
Disconnect the opener by pulling the emergency release cord. Door should be fully closed before disconnecting.
Manually lift the door to about chest height (3-4 feet off ground).
Let go. A properly balanced door will:
- Stay in place where you release it, or
- Drift very slowly up or down
A door that drops quickly toward closed is under-tensioned (springs too weak). A door that shoots up toward open is over-tensioned (springs too tight).
Why balance matters for cables:
Under-tensioned springs mean cables support more of the door’s weight than they should. This overloads cables and accelerates wear. Opener motor also strains, further stressing cables.
Over-tensioned springs create excessive pull on cables. While springs are doing the lifting work, the cables experience higher tension than necessary. This can cause premature fraying.
Springs naturally lose tension over time—it’s normal wear. As springs weaken, door becomes heavier for cables to manage. This is why old springs contribute to cable failure. You might replace cables only to have new ones fail quickly because springs are weak.
Balancing requires professional service:
Spring adjustment involves winding or unwinding torsion springs or adjusting extension spring positions. This work is dangerous—springs are under hundreds of pounds of tension. Professional technicians have:
- Specialized winding bars
- Training to handle spring tension safely
- Knowledge of proper tension for your door weight
- Tools to measure and verify correct balance
Don’t attempt spring adjustment yourself. For safe and reliable spring replacement and adjustment services, licensed professionals have the expertise and tools needed. According to Consumer Product Safety Commission data, spring-related injuries are among the most serious garage door accidents.
Signs your door needs balancing:
- Failed balance test (door drops or shoots up)
- Door feels very heavy when manually lifted
- One side rises faster than other (uneven spring tension)
- Opener strains or reverses when closing
- Cables show uneven wear (one frayed more than other)
- Door doesn’t stay fully open without opener holding it
Balancing as preventive maintenance:
Schedule professional balance check:
- Annually as routine maintenance
- After any spring work
- If door operational characteristics change
- Before replacing cables (ensure new cables won’t be overloaded)
A door that’s been properly balanced puts appropriate stress on cables, dramatically extending their life. This is essential to preventing garage door cable snapping.
If you’re in NYC and need balance adjustment or spring service, licensed professionals can safely adjust springs and verify proper door balance to protect your cables.
When to Replace Cables Proactively
Sometimes the best way to prevent garage door cable snapping is replacing cables before they fail. Proactive replacement gives you control over timing rather than dealing with emergency failure.
When to consider replacement:
Age and cycle count: Cables typically last 10,000-15,000 cycles. If you operate your door 4 times daily, that’s roughly 7-10 years. If your cables are approaching this age, consider replacement even if they look okay.
Visible wear: Any fraying, broken strands, or heavy rust means replacement time. Don’t wait for complete failure.
Repeated rust issues: If cables constantly develop rust despite your best prevention efforts, they’re probably in an environment too harsh for standard cables. Upgrade to galvanized or stainless steel.
After spring replacement: When springs are replaced, it makes sense to replace cables too. Both components experience similar wear patterns. If springs failed from age, cables are similarly aged.
Uneven wear: If one cable shows significant wear while the other looks fine, replace both. The good-looking cable has experienced the same stress and will likely fail soon after the obviously bad one.
Cost of proactive vs emergency replacement:
Scheduled cable replacement: $150-250 typically, can be done at your convenience, combined with other maintenance.
Emergency cable replacement: $250-400+, often after-hours premium, may include emergency service charges, plus the inconvenience of door being inoperable.
Proactive replacement is cheaper when you factor in potential vehicle access problems, rushed timing, and emergency pricing.
What gets replaced with cables:
When doing cable replacement, also inspect and potentially replace:
Pulleys: If cables were worn, pulleys likely show wear too. Replace worn pulleys—they’re inexpensive and new cables will last longer with smooth pulleys.
Drums: Check cable drum grooves for wear. Severely worn drums should be replaced to prevent premature cable damage.
Bottom brackets: These anchor cables to door corners. If brackets are bent or worn, replace them.
Doing comprehensive replacement of the cable system ensures all components have similar remaining lifespan.
DIY vs professional replacement:
Cable replacement is technically possible for skilled DIYers, but I strongly recommend professional service. Here’s why:
Safety concerns: Working around spring tension and heavy doors creates injury risk. Cables are under load even when door is closed.
Proper technique matters: Cables must be correctly seated in drums, properly threaded through pulleys, and adjusted to correct tension. Errors create premature failure or safety issues.
Special tools needed: Cable installation tools, winding bars, and measuring devices aren’t in most homeowners’ toolboxes.
Warranty protection: Professional installation usually includes warranty. DIY installation voids warranties and leaves you liable for any resulting damage.
For most homeowners, professional cable replacement is the smart choice. The cost difference between DIY and professional isn’t huge, and professional work ensures safety and proper installation.
Upgrading during replacement:
If replacing cables, consider upgrades:
Longer-lasting materials: Galvanized or stainless steel for harsh environments.
Heavier gauge: Thicker cables for heavy doors or high-cycle use.
Safety cables: If your door has extension springs without safety cables, add them during replacement. They prevent broken springs from becoming projectiles.
Proactive cable replacement—before failure occurs—is one of the smartest maintenance decisions for preventing garage door cable snapping. You control the timing, avoid emergency pricing, and prevent the inconvenience and potential danger of sudden cable failure.
Professional Maintenance and Inspection
While you can do much to prevent garage door cable snapping through DIY maintenance, professional service provides capabilities you can’t replicate.
What professionals check that you can’t:
Precise spring tension measurement: Technicians have tools to measure exact spring tension and verify it matches door weight specifications. You can test balance subjectively, but pros measure it precisely.
Cable tension verification: Proper cable tension is critical. Too tight or too loose accelerates wear. Professionals use tension gauges to ensure cables are within specification.
Complete system integration check: Cables don’t work in isolation. Pros verify that springs, drums, pulleys, tracks, and opener are all functioning together properly with correct load distribution.
Hidden wear detection: Experience lets technicians spot early wear patterns you’d miss. They know what normal wear looks like versus dangerous deterioration.
Safety compliance verification: Professional inspection ensures your garage door system meets current safety standards and local codes.
How often for professional service:
Annual minimum for residential doors. Schedule in spring or fall for pre-season preparation. Book your annual garage door tune-up to ensure optimal performance.
Bi-annual for high-use doors. If your door cycles 8+ times daily or it’s on commercial property, twice-yearly service is appropriate.
After any significant event: Storm damage, impact, unusual sounds, or operational changes warrant professional inspection.
Before/after major repairs: If you’ve had springs replaced or other significant work, professional follow-up verifies everything is working together correctly.
What professional service typically includes:
- Complete visual inspection of all components
- Spring tension testing and adjustment
- Cable condition assessment
- Lubrication of all moving parts
- Hardware tightening
- Track alignment check
- Opener performance verification
- Safety feature testing
- Photo-eye sensor alignment
- Weatherstripping inspection
Comprehensive service addresses issues you might not notice and prevents problems from escalating.
The inspection report value:
Quality service providers document findings and recommendations. This provides:
- Record of your door’s condition over time
- Advance notice of components approaching end-of-life
- Maintenance history for warranty purposes
- Planning information for budgeting future repairs
Cost considerations:
Professional inspection and tune-up typically runs $100-150. This seems expensive until you consider:
- Emergency cable replacement: $250-400+
- Door falling and causing damage: $500-2000+
- Injury from cable failure: Potentially catastrophic
- Peace of mind: Priceless
The annual service cost is cheap insurance against expensive failures and safety incidents.
Choosing quality service providers:
Look for companies that:
- Are licensed, bonded, and insured
- Have experienced technicians (not just salespeople)
- Offer comprehensive inspections (not just sales pitches)
- Provide written documentation of findings
- Guarantee their work
- Have good local reputation
For comprehensive service in NYC, experienced garage door professionals provide thorough inspections and maintenance that extend cable and system life.
Professional maintenance doesn’t replace your monthly checks—it supplements them. The combination of regular DIY inspection and annual professional service provides the best protection to prevent garage door cable snapping.
Emergency Response: When Cables Fail Despite Prevention
Sometimes cables fail despite your best efforts. Knowing how to respond to cable failure keeps people safe and minimizes damage.
Recognizing cable failure:
Complete break: Door suddenly drops, won’t open at all, you may hear loud snap. One or both cables have broken completely.
Partial failure: Door operates unevenly, one side higher than other, visible cable damage but still partially functional.
Imminent failure: Severe fraying, multiple broken strands, obvious imminent breakage.
What to do immediately:
Stop using the door. Don’t attempt to open or close it further. Partial operation with damaged cables risks complete failure and injury.
Disconnect the opener. Pull the emergency release to prevent anyone from trying to operate the door with the remote or wall button.
Clear the area. Keep people and pets away from the door. Even a partially functioning door with damaged cables is dangerous.
Mark the door. Put tape or sign warning others not to use door. In multi-family buildings or shared garages, this prevents others from attempting operation.
Don’t attempt DIY repair. Cable replacement requires handling spring tension and proper installation technique. Improper DIY cable work has caused serious injuries.
Call emergency service. Most major metro areas including NYC have same-day emergency garage door repair available.
If you must exit the garage with failed cable:
Manually opening a door with broken cable is extremely dangerous. The door is no longer balanced—full weight could drop on you or your vehicle.
If you absolutely must get a vehicle out:
- Get help—minimum two strong people
- Lift door very slowly and carefully
- Have someone brace door at intervals
- Never stand under partially raised door
- Use extreme caution
Better option: Call emergency service and wait. It’s not worth the injury risk to save a couple hours.
Preventing recurrence:
After emergency repair, determine what caused the failure:
- Were cables original installation (overdue for replacement)?
- Was rust a factor (need better environmental protection)?
- Were springs weak (should have been replaced earlier)?
- Was maintenance insufficient (need better routine)?
Address the root cause to prevent repeat failures. If cables failed prematurely, investigate whether door balance, spring condition, or environmental factors contributed.
Emergency service considerations:
Have emergency contact information accessible before you need it:
- Save numbers in phone
- Post on garage wall
- Share with family members
For 24/7 emergency response in NYC, emergency garage door services can address cable failures quickly, restoring safe door operation.
While the goal is preventing cable failures through proper maintenance, having emergency response plans ensures you can handle failures safely when prevention isn’t enough.
Bottom Line: Keeping Cables Safe Long-Term
After covering everything about how to prevent garage door cable snapping, here’s what matters most:
Monthly inspection catches problems early. Five minutes with a flashlight looking for fraying, rust, and proper operation prevents surprise failures. Make this routine.
Lubrication is cheap insurance. Quarterly lubrication reduces friction, prevents rust, and extends cable life significantly. A $10 can of lubricant and 15 minutes pays for itself many times over.
Environmental protection is critical in NYC. Rust prevention, salt removal, humidity control—these aren’t optional in our challenging climate. Aggressive environmental protection keeps cables functional.
Door balance matters. Weak springs overload cables. Proper spring tension distributes load correctly and extends cable life. Balance testing should be part of regular maintenance.
Know when to replace proactively. Don’t wait for cables to snap. Age, visible wear, repeated rust issues—these signal it’s time for replacement. Scheduled replacement is cheaper and safer than emergency repair.
Professional service provides value you can’t replicate. Annual inspection by experienced technicians catches issues you’d miss and ensures proper system function.
Respect the danger. Cable replacement, spring adjustment, and repairs involving tension require professional expertise. DIY attempts risk serious injury.
Start by inspecting your cables right now. Takes 5 minutes. Look for fraying, rust, or damage. If you see any, call professionals before the next failure occurs.
Then establish monthly inspection routine. Put it on your calendar. Make it automatic. Schedule a professional inspection if you haven’t had one in the past year.
Finally, schedule annual professional service. This isn’t optional—it’s essential maintenance that prevents failures and extends the life of your entire garage door system.
Your cables support hundreds of pounds daily. They deserve attention and maintenance. Following these guidelines to prevent garage door cable snapping protects your property, ensures safe door operation, and saves money versus dealing with emergency failures.